- Letters from Dad
- Posts
- Storage Bin Rack (Original) | Dad Advice From Bo
Storage Bin Rack (Original) | Dad Advice From Bo
Plans for my original storage bin rack which was featured in my video on October 7, 2024.
Bo Petterson
August 22, 2025
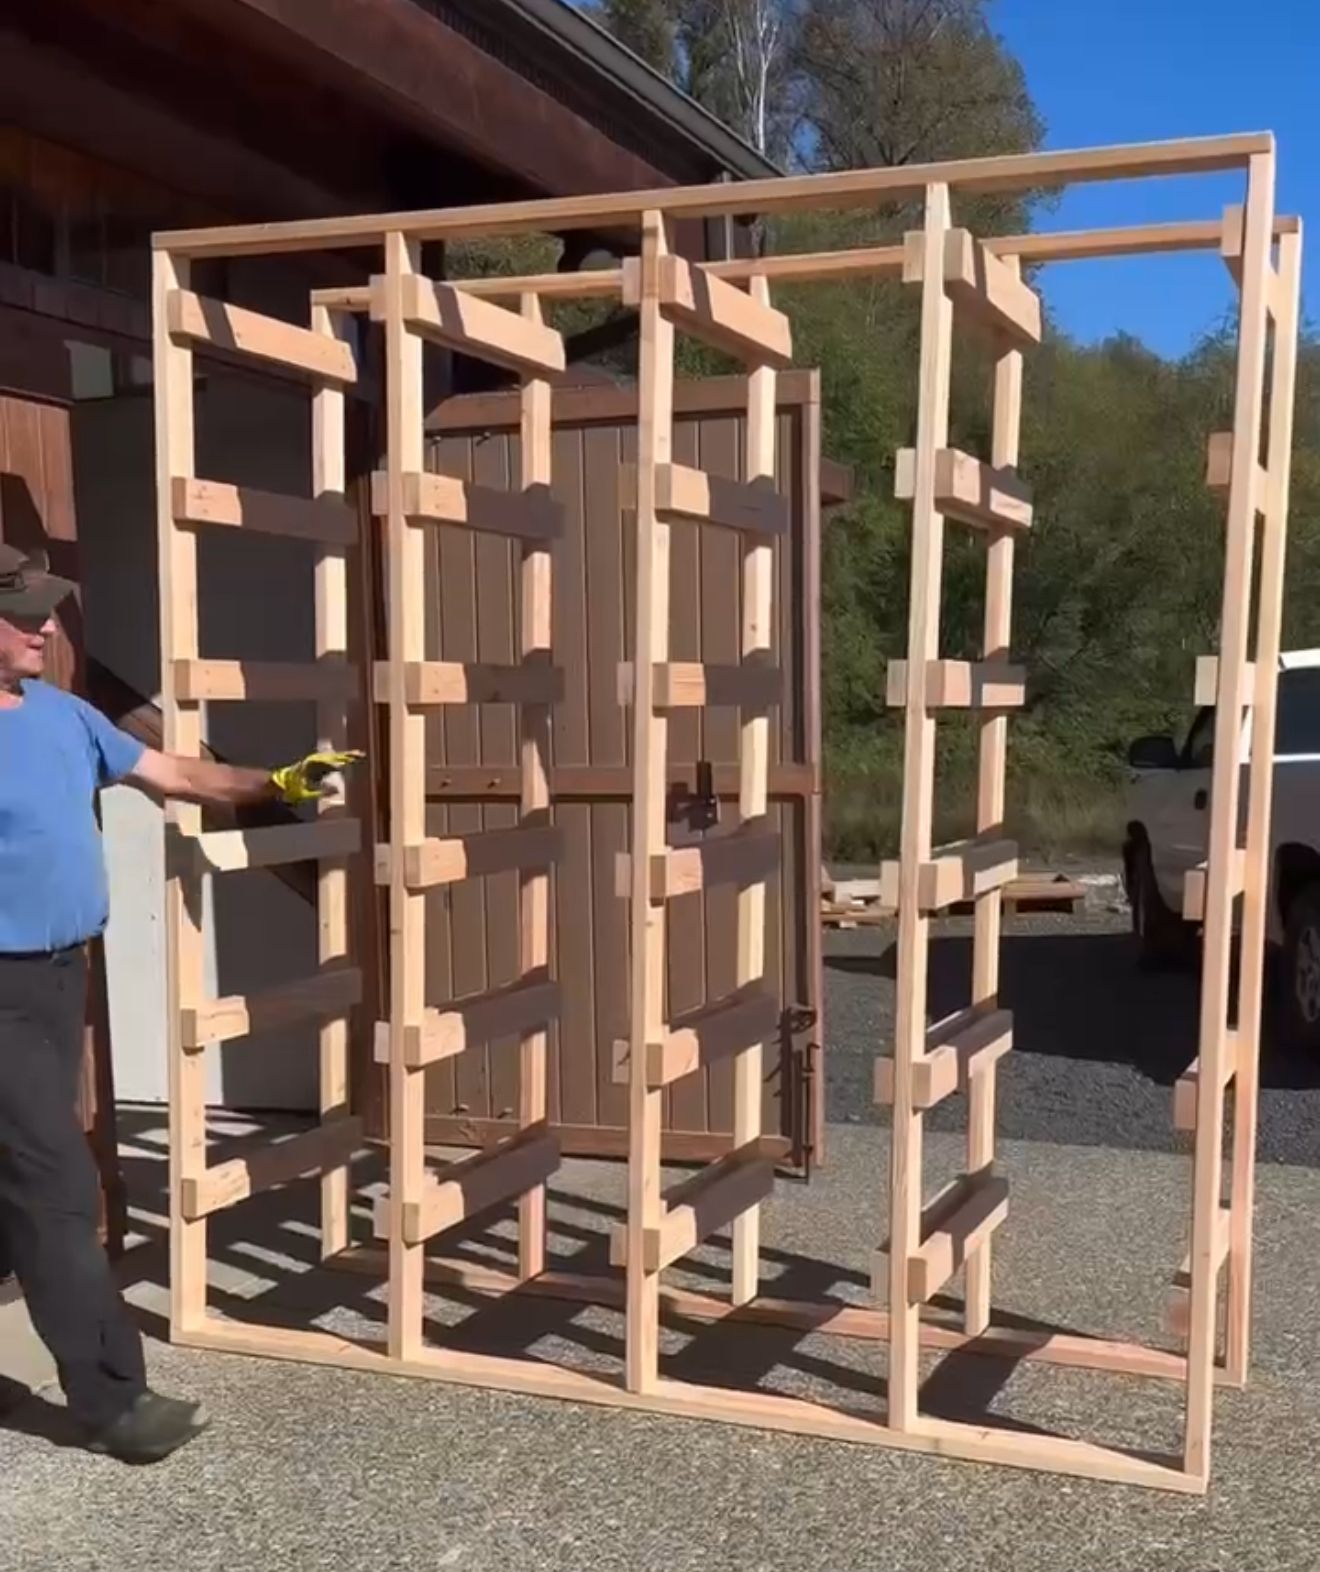
These plans are to accompany the social media video I made originally published on October 7, 2024 on Tiktok, Instagram and YouTube.
*NOTE: If you are looking for SIDEWAYS Storage Bin Rack plans, please click here.
Shopping List: For 8ft tall rack
- Storage Bins (My bins are all 27 gallon. They measure 20” across and 30” long).
- Quantity 14 (2 x4 x 8’) Lumber (will be cut into 48 short pieces)
- Quantity 12 (2 x 4 x 10’) Lumber (will be cut into 4 pieces for top and bottom + 10 pieces for the uprights)
- Construction screws (#9 x 2.5”)
- Optional: 2 sheets of 4 x 8 x ½” plywood for the back
- Optional: 2 extra (2 x 4 x 8”) to be cut into “spacers”
Tools Needed:
Drill (This is the drill I use, any will work)
Table Saw (borrow if needed)
Clamps
---------------------------------
Cut sheet (all 2x4’s):
24 bins (8 feet high) – Requires 14 (2 x4 x 8’) and 12 (2 x 4 x 10’)
Cut #1 = 10 x 95” for vertical uprights
Cut #2 = 4 x 91 1/2” for top and bottom horizontal pieces
Cut #3 = 48 x 29” for short braces
OR, if you are building a 6ft bin rack, below is the cut list
20 bins (6” high) – Requires 14 (2 x4 x 8’) and 10 (2 x 4 x 10’)
10 x 79” – Vertical uprights
4 x 91 1/2”
– top and bottom horizontal pieces
40 x 29” – short braces
Spacer blocks for assembly = need 2 (2 x 4 x 8”)
2 x 22”
2 x 21” (MARK AS “SPACER”)
2 x 12”
2 x 10 ½”
---------------------------------
How to assemble your storage bins:
Step 1: Cut all 2 x 4’s to length (according to cut list) including the 8 required spacer blocks. You will end up with:
§ 10 vertical uprights measuring 95”
§ 4 long pieces for top and bottom measuring 91 ½”
§ 48 shorter braces measuring 29”
§ See spacer sizes above and in video
Step 2: Attach vertical pieces to table using 22” measurement block as spacers at top and bottom.
Step 3: Attach one 29” piece to bottom of uprights as temporary end brace.
Step 4: Start with 10 ½” blocks and attach first 29” short brace (the bottom row does not accommodate for bin lids under it like the rest, which is why this one is shorter)
Step 5: Switch to 12” blocks and install the remaining 29” short braces.
Step 6: Detach assembly from table and remove 29” temporary end brace from bottom.
• Repeat the above steps two times to make both your end assemblies.
• To build middle “ladders”, repeat the above steps three more times except the time, flip the assembly over, reattach the 29” temporary end brace to the bottom and follow the steps above to attach all of the short braces to the opposite side.
• Note: install 4 screws in each short brace (2 per end).
Step 7: Lay all 5 assembled uprights on their sides with the three double sided assemblies in the middle and the two single sided assemblies on the ends (2 x 4’s facing inward). Set assemblies approximately 24” apart.
Step 8: Using the two 21” blocks marked as “SPACERS”, attach the two bottom horizontal 2x4’s by starting at one end and working your way to the other end attaching the assembled uprights with two screws as you go. Be sure the assemblies are held tight against the spacer blocks.
Step 9: Attach the two remaining horizontal 2 x 4’s to the top of the assemblies using the same spacer blocks as in step 8.
Step 10: If desired, attach the two sheets of plywood to the back of the assembled unit. This will square up the unit and make it sturdy. Note: you will need to rip each piece down the 8’ length with a skill saw or table saw. Use shorter 1 1/4” construction screws.
Disclaimer: As always, engage in construction work at your own risk. This is just my method.